CNApy

An integrated visual environment for metabolic modeling methods such as FBA, FVA and Elementary Flux Modes, and advanced features such as thermodynamic methods, extended Minimal Cut Sets, OptKnock, RobustKnock, OptCouple and more!
CNApy - An integrated environment for metabolic modeling
Introduction
If you have questions or suggestions regarding CNApy, you can use either of the CNApy GitHub issues, the CNApy GitHub discussions or the CNApy Gitter chat room.
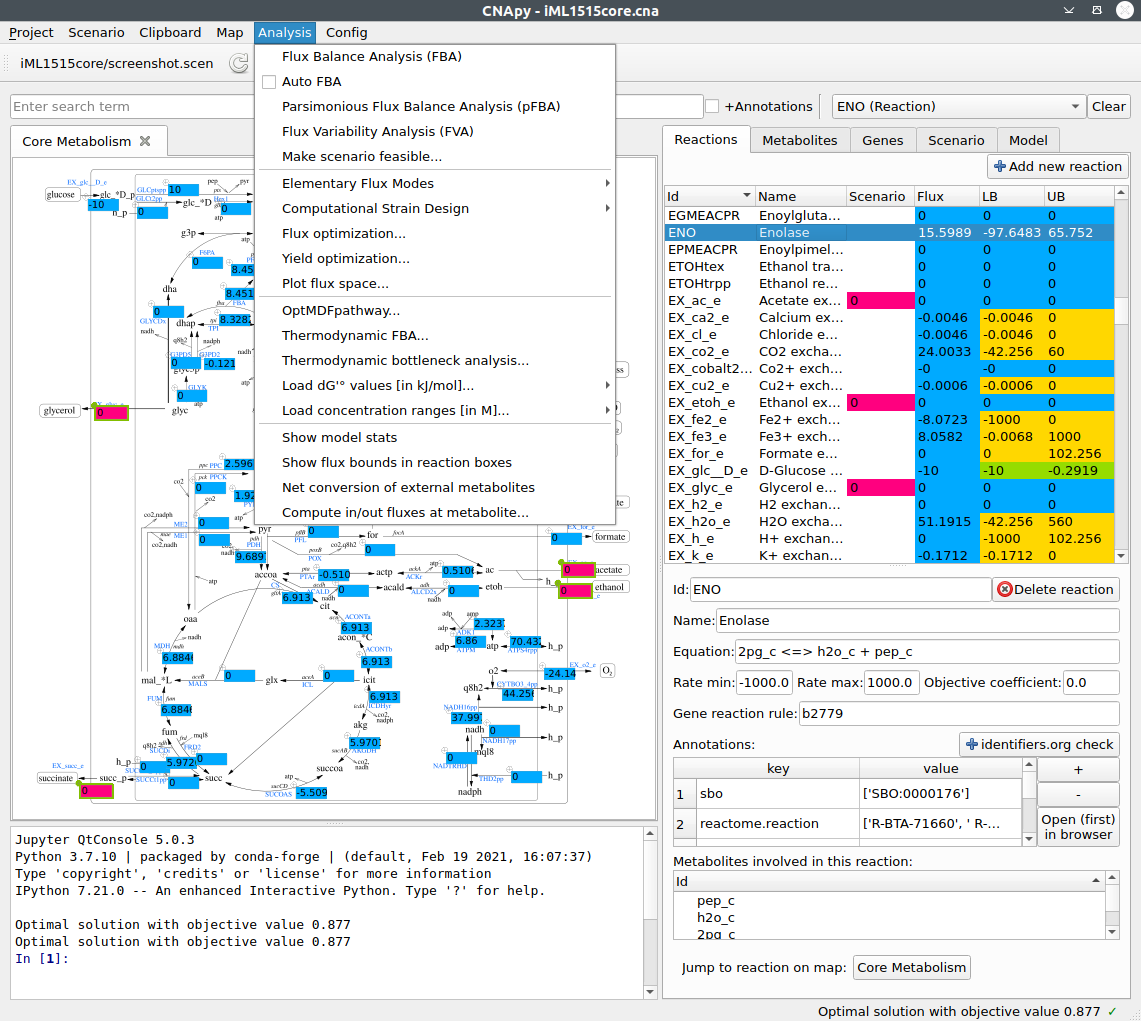
CNApy is a Python-based graphical user interface for a) many common methods of Constraint-Based Reconstruction and Analysis (COBRA) with stoichiometric metabolic models, b) the visualization of COBRA calculation results and c) the creation and editing of metabolic models.
Supported COBRA methods include Flux Balance Analysis (FBA), Flux Variability Analysis (FVA), Minimal Cut Sets (MCS), Elementary Flux Modes (EFM) and many more advanced strain design algorithms through its integration of the StrainDesign package.
All calculation results can be visualized in CNApy’s interactive metabolic maps, which can be directly edited by the user. Escher maps are also natively supported and can be created and edited inside CNApy.
Aside of performing calculations on metabolic models, CNApy can also be used to create and/or edit metabolic models, including all important aspects of the model’s reactions, metabolites and genes. CNApy supports the widely used SBML standard format for model loading and export.
For more details on CNApy’s many more features, see section Documentation and Tutorials.
For information about how to install CNApy, see section Installation Options.
For information about how to contribute to CNApy as a developer, see section Contribute to the CNApy development.
If you want to cite CNApy, see section How to cite CNApy.
Associated project note: If you want to use the well-known MATLAB-based CellNetAnalyzer (CNA), which is not compatible with CNApy, you can download it from CNA’s website.
Documentation and Tutorials
- The CNApy guide contains information for all major functions of CNApy.
- Our CNApy YouTube channel provides some videos of working with CNApy.
- We also provide directly usable CNApy example projects which include some of the most common E. coli models. These projects can also be downloaded within CNApy at its first start-up or via CNApy’s File menu.
Installation Options
There are three ways to install CNApy:
- As the easiest installation way which only works under Windows, you can use the .exe installer attached to the assets at the bottom of CNApy’s latest release.
- Under any operating system, you can install CNApy as a conda package as described in section Install CNApy as conda package.
- If you want to develop CNApy, follow the instruction for the successful cloning of CNApy in section Setup the CNApy development environment.
Contribute to the CNApy development
Everyone is welcome to contribute to CNApy’s development. See our contribution file for more detailed instructions.
Install CNApy as conda package
-
We use conda as package manager to install CNApy, so that, if not already done yet, you have to install either the full-fledged Anaconda or the smaller miniconda conda installern on your system.
-
Add the additional channels used by CNApy to conda:
conda config --add channels IBMDecisionOptimization conda config --add channels Gurobi -
Create a conda environment with all dependencies
conda create -n cnapy-1.2.8 -c conda-forge -c cnapy cnapy=1.2.8 -
Activate the cnapy conda environment
conda activate cnapy-1.2.8 -
Run CNApy within you activated conda environment
cnapy
Furthermore, you can also perform the following optional steps:
-
(optional and only recommended if you have already installed CNApy by using conda) If you already have a cnapy environment, e.g., cnapy-1.X.X, you can delete it with the command
# Here, the Xs stand for the last CNApy version you've installed by using conda conda env remove -n cnapy-1.X.X -
(optional, but recommended if you also use other Python distributions or Anaconda environments) In order to solve potential package version problems, set a systems variable called “PYTHONNOUSERSITE” to the value “True”.
Under Linux systems, you can do this with the following command:
export PYTHONNOUSERSITE=TrueUnder Windows systems, you can do this by searching for your system’s “environmental variables” and adding the variable PYTHONNOUSERSITE with the value True using Window’s environmental variables setting window.
Setup the CNApy development environment
We use conda as package manager to install all dependencies. You can use miniconda. If you have conda installed you can:
-
Create a conda development environment with all dependencies
conda env create -n cnapy-dev -f environment.yml -
Activate the development environment
conda activate cnapy-dev -
Checkout the latest cnapy development version using git
git clone https://github.com/cnapy-org/CNApy.git -
Change into the source directory and run CNApy
 cd CNApy
 python cnapy.py
Any contribution intentionally submitted for inclusion in the work by you, shall be licensed under the terms of the Apache 2.0 license without any additional terms or conditions.
How to cite CNApy
If you use CNApy in your scientific work, please consider to cite CNApy’s publication:
Thiele et al. (2022). CNApy: a CellNetAnalyzer GUI in Python for analyzing and designing metabolic networks. Bioinformatics 38, 1467-1469, doi.org/10.1093/bioinformatics/btab828.